Protecting Your Clinical Investment
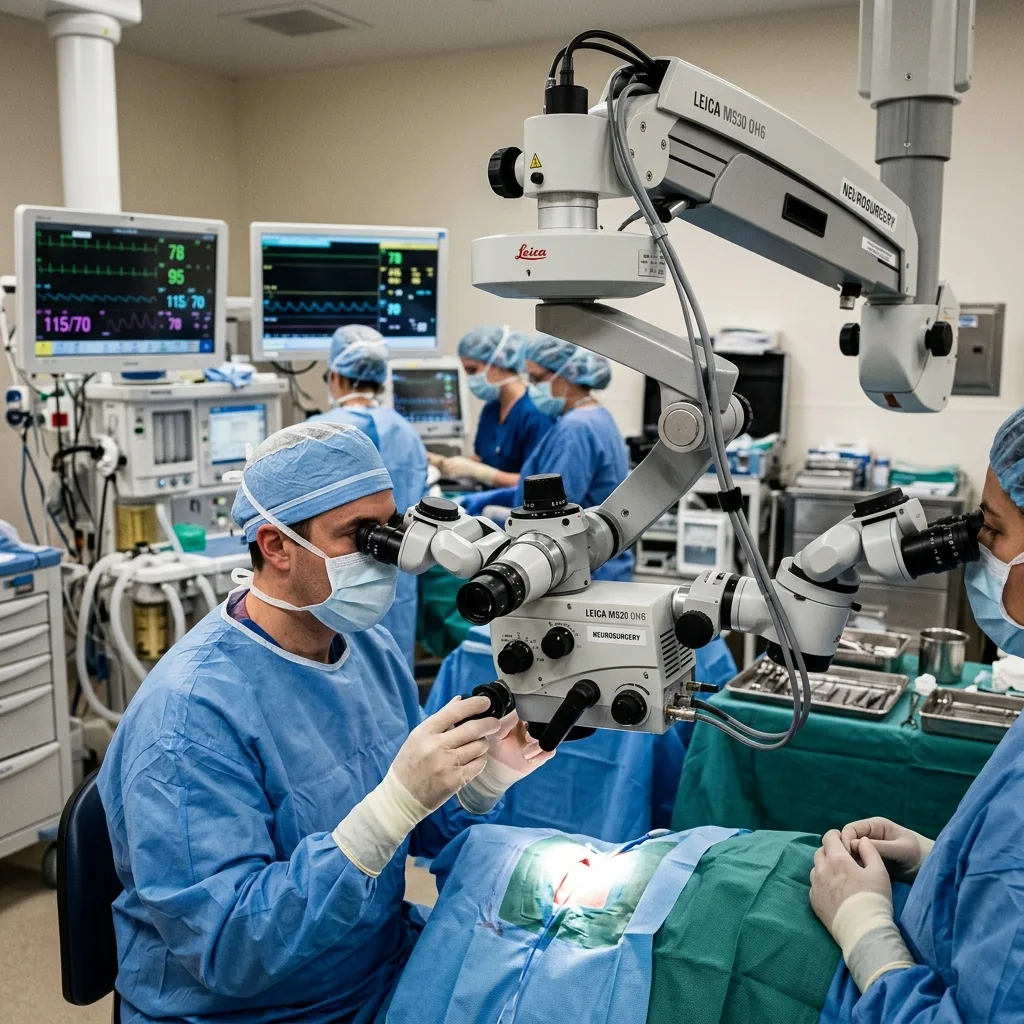
An operating microscope is a complex fusion of high-precision apochromatic glass, delicate motorized electronics, and heavy-duty mechanical suspension arms. When operating correctly, it is an invisible extension of the surgeon’s eyes and hands. When poorly maintained, it becomes a clinical hazard—causing surgeon fatigue from drifting arms, blurred vision from dirty lenses, or surgical site contamination from improper draping.
For hospital Biomedical Engineers (Biomeds), Operating Room (OR) nurses, and facility managers, establishing a strict operating microscope maintenance checklist is vital. Proper daily care and annual preventative maintenance (PM) not only protect patient safety but also extend the capital equipment’s lifespan from 5 years to well over 15 years.
This comprehensive guide covers the essential procedures for surgical microscope balancing, sterile draping, safe optical cleaning, and rapid troubleshooting to minimize OR downtime.
2. The Art of Counterbalance Balancing: Fixing the “Drifting Arm”
The most frequent complaint surgeons have regarding operating microscopes is drifting—the frustrating tendency of the optical head to slowly sink, rise, or drift sideways when the surgeon lets go of the handgrips.
A high-quality operating microscope utilizes a counterbalanced suspension arm (using internal gas struts or heavy-duty mechanical springs). When properly balanced, the heavy optical head (which can weigh over 15 kg with camera attachments) feels completely weightless.
Plaintext
                  3-AXIS BALANCING WORKFLOW
+-------------------------------------------------------------------------+
| STEP 1: Add all accessories (Cameras, Assistant scopes, Drapes) first.  |
| STEP 2: Balance the A/B Axis (Front-to-Back & Side-to-Side Tilt).       |
| STEP 3: Balance the Z-Axis (Up-and-Down Vertical Suspension).           |
| GOAL:   Microscope stays perfectly still at any angle when released.    |
+-------------------------------------------------------------------------+
The Standard Surgical Microscope Balancing Procedure
To achieve perfect counterbalance, OR staff must perform the following procedure after all accessories are attached but before the patient is positioned:
-
Attach All Equipment: Mount the beam splitter, video camera, assistant co-observation tube, and sterile drapes. (Balancing a naked microscope and then adding a 2 kg camera later will instantly cause downward drift).
-
Release the Brakes: Unlock the magnetic or mechanical friction brakes on the suspension arm and the optical head.
-
Balance the Optical Head (Tilt & Roll):
-
Hold the microscope head. If it tends to tilt forward (heavy front), turn the front-to-back balance knob until the head stays level.
-
If the head rolls to the left or right, adjust the lateral balance knob until it remains perfectly centered.
-
-
Balance the Suspension Arm (Vertical Z-Axis):
-
Pull the microscope down towards the floor and let go.
-
If it rises on its own, the spring tension is too high (turn the main suspension tension knob toward the “minus” or decrease setting).
-
If it sinks toward the floor, the spring tension is too low (turn the knob toward the “plus” or increase setting).
-
-
The Finger Test: Push the microscope into a complex angled position using only your index finger. When you remove your finger, the machine must freeze in mid-air.
3. Sterile Draping and Infection Control Protocols
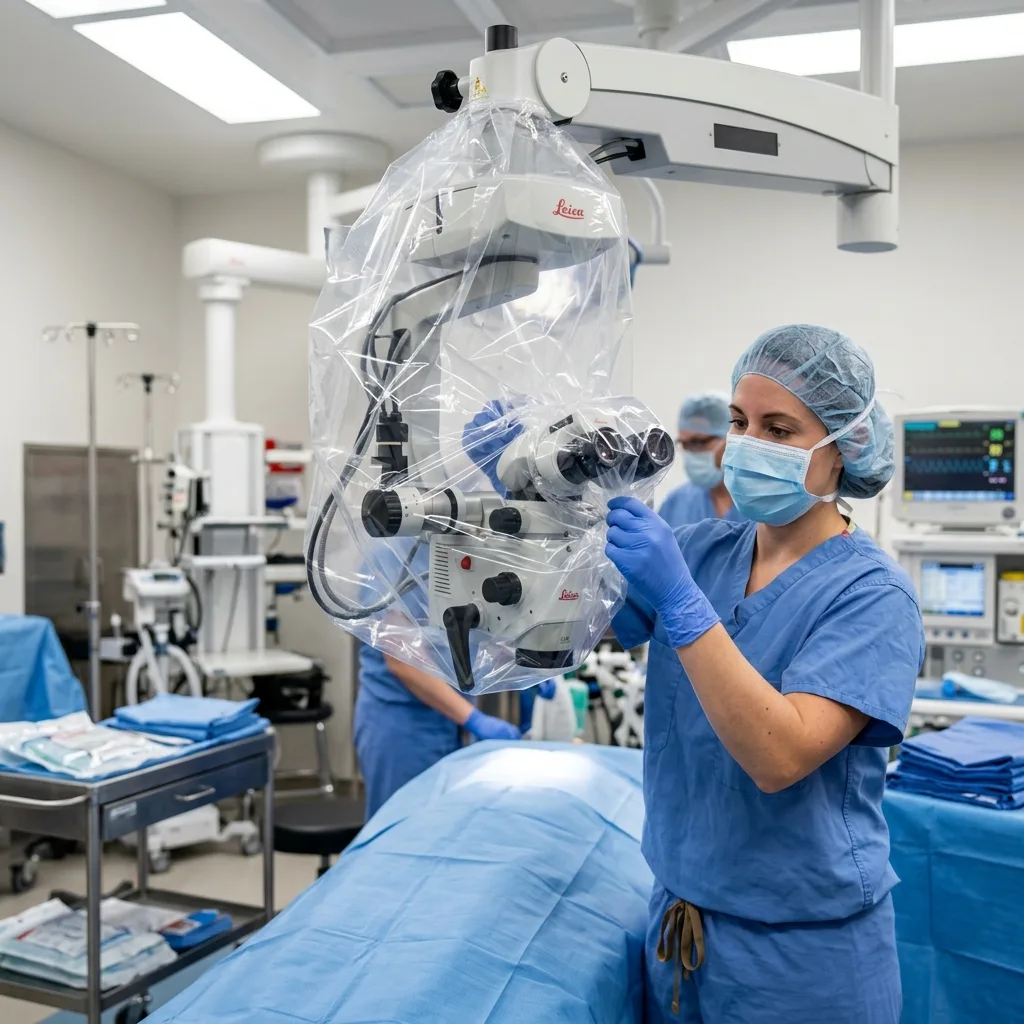
Operating microscopes are stationed directly above the open surgical cavity, making them a high-risk vector for surgical site infections (SSI) if not properly isolated.
How to Drape a Surgical Microscope
Sterile draping is a critical nursing task performed during the OR setup. Because operating microscopes generate heat (from illumination bulbs and motors) and require clear optical pathways, draping must be done systematically:
-
Select the Correct Drape: Ensure the sterile polyethylene drape matches your specific microscope model (e.g., Zeiss, Leica, or UMY Medical dimensions).
-
Apply the Objective Lens Cover: Start at the bottom. Secure the rigid, sterile glass or plastic objective lens cover directly onto the microscope’s main objective lens. Ensure it is clicked in tightly; a loose lens cover will cause severe optical glare.
-
Pull Upward: Carefully pull the telescopic drape upward over the optical head, the binocular tubes, and the suspension arm.
-
Secure the Eyepieces: Push the binocular eyepieces through the designated elastic holes in the drape. (Surgeons’ eyes remain unsterile, touching the unsterile rubber eyecups, while the rest of the microscope is draped).
-
Ventilation Clearance: Critical Step. Ensure the drape does not block the ventilation exhaust grills on the microscope head or the light source box. Blocking these vents can cause the LED or Xenon bulb to overheat, triggering a thermal safety shutdown mid-surgery.
-
Tie Down Loose Fabric: Use the provided sterile Velcro or adhesive strips to tightly wrap excess drape material around the arm, preventing the fabric from brushing against the sterile surgical team.
4. Cleaning Apochromatic Optical Lenses: What NOT to Do
The objective lens and eyepieces are the most sensitive components of the microscope. Apochromatic lenses feature microscopic anti-reflective (AR) coatings that increase light transmission and reduce glare. Cleaning these lenses incorrectly will scratch the glass, strip the AR coating, and permanently degrade tissue contrast.
Plaintext
                  SAFE OPTICAL CLEANING PROTOCOL
+-------------------------------------------------------------------------+
| APPROVED MATERIALS --> Lens-grade optical tissue, cotton swabs, blower. |
| APPROVED SOLVENTS  --> 70% Isopropyl Alcohol, Ether-Alcohol mixture.    |
| BANNED MATERIALS   --> Paper towels, surgical gauze, dry scrubbing.     |
| BANNED SOLVENTS    --> Acetone, ammonia, standard window glass cleaners.|
+-------------------------------------------------------------------------+
Removing Blood and Saliva
During ENT, dental, or neurosurgery, blood splatter or saline droplets can hit the objective lens.
-
Do not let it dry. If blood dries, it binds to the lens coating.
-
Moisten a sterile cotton swab with distilled water to gently soften the dried blood.
-
Once softened, use a new swab moistened with 70% isopropyl alcohol. Gently wipe in a circular spiral motion, starting from the center of the lens and moving outward toward the edges.
-
Discard the swab immediately after one pass to avoid dragging microscopic debris across the lens.
Removing Fingerprints and Eyelash Oil
Surgeons often accidentally smear eyelash oil on the eyepieces.
-
Use a rubber dust blower to remove loose dust particles first.
-
Apply a drop of optical lens cleaning solution (or ether-alcohol mix) to a soft, lint-free optical lens tissue.
-
Gently wipe the eyepiece glass in a single, smooth motion. Never scrub back and forth.
5. Preventative Maintenance (PM) Checklist for Biomeds
To minimize emergency repair calls, hospital clinical engineering departments should implement a structured preventative maintenance schedule for all operating microscopes.
| Maintenance Task | Frequency | Action / Inspection Details |
| Brake & Tension Check | Daily (By OR Staff) | Verify that manual friction knobs lock securely and electromagnetic brakes release smoothly when buttons are pressed. |
| Objective Lens Cleaning | Daily (Post-Op) | Inspect the main objective lens and eyepieces for dust, dried fluids, or fingerprints. Clean using optical tissue. |
| Illumination Test | Monthly (By Biomed) | Check LED/Halogen light intensity. Inspect fiber optic cables for broken internal fibers (indicated by dark spots in the light beam). |
| Cable & Wiring Inspection | Quarterly | Check the main power cord, foot pedal cables, and video HDMI/SDI cables for fraying, crushing, or exposed wires. |
| Suspension Arm Lubrication | Bi-Annually | Apply manufacturer-approved medical-grade lubricant to the pivot joints and vertical axis columns to prevent squeaking and stiffness. |
| Electrical Safety Test | Annually | Perform standard hospital electrical leakage current tests (IEC 60601-1) to ensure chassis grounding is intact. |
| Optical Alignment Check | Annually | Verify parfocality (ensure the image remains in sharp focus when zooming in and out continuously). |
6. Common Troubleshooting Guide
When a surgical microscope fails in the OR, the biomedical technician must diagnose the issue instantly. Below is a quick-reference guide for the most common operating microscope failures:
Problem: The optical head drifts downward during surgery.
-
Cause: The surgical microscope balancing procedure was skipped, or an accessory was added after balancing.
-
Fix: Pause the surgery momentarily. Instruct the nurse to tighten the Z-axis friction lock, or rapidly adjust the main suspension spring tension knob to compensate for the weight.
Problem: The illumination is very dim or yellow.
-
Cause 1 (Halogen/Xenon): The bulb has reached the end of its lifespan (Xenon degrades after 500 hours; Halogen after 100 hours).
-
Cause 2 (Fiber Optic): The fiber-optic light guide cable is damaged. If the cable is sharply bent or crushed by a rolling cart, the internal glass fibers shatter, preventing light from reaching the optical head.
-
Fix: Swap to the backup bulb module (most microscopes have a rapid-swap dual-bulb cartridge). If the fiber-optic cable is damaged, it requires replacement.
Problem: The image is blurred, and the surgeon complains of double vision (Diplopia).
-
Cause: The surgeon’s interpupillary distance (IPD) is set incorrectly, or the diopter settings on the eyepieces are mismatched.
-
Fix: Reset the diopter rings on both eyepieces to “0”. Ask the surgeon to look through the microscope and adjust the distance between the two ocular tubes until they see a single, perfect circle. Then, have the surgeon adjust each diopter ring independently to match their specific eyesight.
Problem: The zoom or focus foot pedal is unresponsive.
-
Cause: The foot pedal cable is disconnected, or liquid has entered the pedal housing.
-
Fix: Verify the cable connection at the base of the microscope stand. If using a wireless foot pedal, check the battery level and ensure the Bluetooth/RF pairing light is solid.
7. Why UMY Medical Equipment Co Ltd Champions Reliable Engineering
For hospital procurement boards, buying a surgical microscope with excellent optics is only half the battle. The equipment must be durable, easy to maintain, and backed by a reliable supply chain for spare parts.
UMY Medical Equipment Co Ltd designs operating microscopes specifically with hospital biomed teams and OR efficiency in mind.
Maintenance and Procurement Advantages with UMY Medical:
-
Medical LED Surgical Light Integration: UMY Medical microscopes utilize premium, cold-light LED technology. Unlike legacy xenon systems that require costly bulb replacements every few months, UMY’s LEDs deliver over 50,000 hours of continuous operation. This effectively eliminates illumination OPEX (Operational Expenditure) and bulb-related OR downtime.
-
Robust Mechanical Design: Built using aerospace-grade aluminum and precision German-engineered gas struts, UMY Medical suspension arms resist long-term mechanical fatigue, ensuring that the “drifting arm fix” is rarely needed.
-
Ease of Cleaning and Sterilization: The exterior housing of UMY microscopes features seamless, antimicrobial medical coatings, preventing the buildup of surgical fluids and allowing for rapid, effective chemical wipe-downs between cases.
-
Direct Factory Support & Parts: As an ISO 13485 and CE-certified direct manufacturer, UMY Medical provides global distributors and biomedical departments with instant access to OEM spare parts, service manuals, and remote video troubleshooting support, avoiding the lengthy service delays common with third-party dealers.
Frequently Asked Questions (FAQ)
Q1: Can I use standard alcohol wipes to clean the microscope body?
Yes, standard 70% isopropyl alcohol wipes or hospital-grade quaternary ammonium disinfectants (like CaviWipes) are safe for the painted metal housing, suspension arm, and handgrips. However, never use these rough wipes on the optical glass lenses, as they will scratch the anti-reflective coating.
Q2: What is the purpose of the backup bulb module?
During critical procedures like neurosurgery, losing illumination can be catastrophic. Traditional halogen and xenon microscopes feature a rapid-swap module containing a second bulb. If the primary bulb blows, the nurse can pull a lever to instantly slide the backup bulb into the optical pathway. (Note: Modern LED microscopes rarely require this feature due to extreme LED reliability).
Q3: Why does the microscope lose focus when the surgeon zooms in?
This is known as a loss of parfocality. It usually happens because the surgeon did not set the eyepiece diopters correctly before starting. To fix this: Zoom in to maximum magnification, focus the microscope on a flat target using the fine focus knob, then zoom all the way out. If the image blurs, adjust the eyepiece diopter rings until it is sharp. The microscope will now remain in focus across the entire zoom range.
Q4: How often should the fiber-optic light cable be replaced?
Fiber-optic cables do not have a set expiration date, but they degrade over time through repeated bending and mechanical stress. A biomed technician should test the light output (Lux) annually. If the cable loses more than 20% to 30% of its light transmission capacity, it should be replaced to ensure safe surgical visibility.
Q5: How can a hospital order replacement parts or LED upgrades from UMY Medical?
Hospital biomedical engineering departments, procurement officers, and global distributors can contact UMY Medical Equipment Co Ltd directly through their B2B customer service portal. UMY Medical supplies official replacement components, LED upgrade kits, and sterile objective lens caps with expedited international shipping.
Summary
A rigorous operating microscope maintenance checklist is the foundation of surgical safety and equipment longevity. By mastering counterbalance balancing, adhering to strict sterile draping protocols, and adopting safe optical cleaning techniques, OR staff and biomedical engineers can eliminate 90% of intraoperative equipment frustrations.
Furthermore, by sourcing microscopes from maintenance-focused manufacturers like UMY Medical Equipment Co Ltd, hospitals benefit from reliable LED illumination and robust mechanics that drastically lower the long-term total cost of ownership.