There is a dangerous myth in clinical diagnostics: hospital administrators often believe that purchasing a $100,000 top-tier automated biochemistry analyzer guarantees 100% accurate patient results right out of the box.
This is fundamentally false.
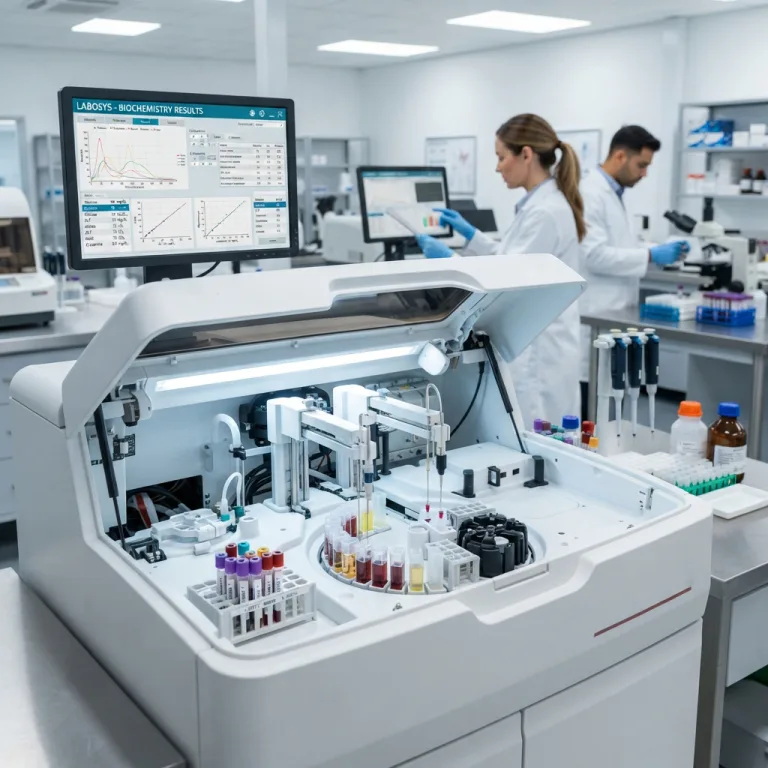
An automated biochemistry analyzer, stripped of its advanced robotics and touchscreens, is essentially a highly precise spectrophotometer. It is completely blind to whether a patient has diabetes, kidney failure, or liver disease. It only knows how to measure light passing through liquid. If a laboratory feeds this state-of-the-art machine degraded chemical reagents, skips routine calibration, or ignores daily quality control alarms, that $100,000 instrument will rapidly and efficiently output life-threatening, inaccurate data.
In clinical chemistry, the hardware is just the vehicle. Reagents, calibration, and quality control (QC) are the navigational system. Understanding how to manage these three pillars is the only way a clinical laboratory can guarantee flawless diagnostic accuracy.
What is the relationship between reagents, calibration, and quality control?
Direct Answer: Reagents are the chemical solutions that react with patient blood to create a measurable color change. Calibration is the mathematical process of teaching the analyzer exactly what concentration a specific color intensity represents. Quality Control (QC) is the daily safety test—running fake “patient” samples with known values to prove that the analyzer’s calibration is still perfectly accurate before testing real human blood.
The Chemistry Lifeline: Understanding Clinical Reagents
A biochemistry reagent is a complex, finely balanced chemical cocktail. Depending on the specific assay, a reagent contains buffers to maintain exact pH levels, specific enzymes, co-enzymes, substrates, preservatives, and chromogens (dyes). When mixed with a patient’s serum, the reagent isolates the target biomarker (like glucose or cholesterol) and triggers a chemical reaction that alters the optical density of the fluid.
Liquid-Stable vs. Lyophilized Reagents
Historically, laboratories used lyophilized (freeze-dried) reagents. Technicians had to manually reconstitute these powders using precise volumes of distilled water. This manual mixing introduced a high risk of volumetric human error and contamination.
Today, modern clinical laboratories almost exclusively use liquid-stable reagents. These are manufactured in ready-to-use liquid formats. The laboratory simply places the barcode-labeled bottle directly into the analyzer’s refrigerated carousel. Liquid-stable reagents eliminate reconstitution errors, save technician time, and offer far superior lot-to-lot consistency.
The Two Laws of Reagent Stability
Procurement managers must monitor two critical expiration metrics when purchasing reagents:
-
Shelf Life (Closed Vial Stability): The expiration date printed on the unopened box, assuming the product has been continuously stored in a cold chain environment (typically 2°C to 8°C).
-
Open Vial Stability (Onboard Stability): The number of days the reagent remains chemically viable after the bottle has been opened and placed inside the analyzer. For sensitive enzymatic tests, open vial stability might be as short as 14 to 30 days. High-end automated analyzers feature onboard refrigerated carousels to maximize this stability. Once a reagent surpasses its open vial stability limit, the enzymes begin to degrade, leading to weak chemical reactions and falsely low patient results.
Calibration: Setting the Analyzer’s “True North”
If a reagent generates a color, how does the analyzer know what that color means?
This is where calibration comes in. A calibrator (sometimes called a standard) is a commercially prepared liquid solution containing a precisely known, certified concentration of a specific analyte (e.g., exactly 100 mg/dL of glucose).
During calibration, the analyzer mixes the reagent with the calibrator instead of patient serum. It measures the resulting optical absorbance. The internal software then creates a mathematical link: “An optical absorbance of 0.500 equals exactly $100\text{ mg/dL}$ of glucose.” This establishes the calibration curve. When a real patient sample generates an absorbance of 0.750, the analyzer uses this established curve to calculate the exact patient concentration.
When must a laboratory recalibrate an analyzer?
Calibration is not a daily task, but it must be performed strictly under the following conditions:
-
New Reagent Lot: Every manufacturing batch (lot) of reagents has slight chemical variations. The machine must learn the exact reaction dynamics of the new lot.
-
Failing Quality Control: If daily QC tests fall outside acceptable ranges, the calibration curve has likely “drifted” and must be reset.
-
Major Maintenance: After replacing a photometric halogen lamp, aspiration probe, or syringe plunger, the optical and fluidic baselines change, requiring full recalibration.
-
Manufacturer Expiration: Many analyzers track calibration intervals via software and lock out testing if a specific assay hasn’t been recalibrated within a mandatory window (e.g., every 30 days).
Quality Control (QC): The Daily Diagnostic Safety Net
Calibration sets the rules. Quality Control (QC) enforces them.
A Quality Control material is a human serum-based fluid manufactured to mimic a real patient sample. However, unlike a real patient, the laboratory knows exactly what the QC sample’s results should be.
Every morning before processing real patient blood, the laboratory technician runs QC samples. If the analyzer outputs the expected values, the machine is verified as accurate, and patient testing can begin. If the analyzer outputs the wrong values, the machine is “out of control,” and no patient samples can be tested until the error is investigated and resolved.
Internal vs. External Quality Control
A comprehensive laboratory accreditation program requires two overlapping tiers of quality control:
1. Internal Quality Control (IQC)
-
Frequency: Run daily (or every shift).
-
Format: The lab runs two to three distinct levels of QC (e.g., Level 1 = Normal healthy values; Level 2 = Abnormally high/pathological values).
-
Purpose: To catch immediate, acute machine failures, such as a clogged pipetting probe, a burned-out optical lamp, or a rapidly degraded reagent bottle.
2. External Quality Assessment (EQA / Proficiency Testing)
-
Frequency: Run monthly or quarterly.
-
Format: An independent regulatory body (like the College of American Pathologists or a national health ministry) sends “blind” samples to the laboratory. The lab tests them and submits the results to a central database.
-
Purpose: To compare the lab’s accuracy against thousands of peer laboratories using the exact same machine and reagents. EQA catches chronic, subtle biases that daily internal QC might miss, ensuring global standardization.
Reading the Data: Levey-Jennings Charts and Westgard Rules
How does a technician definitively know if a daily QC result is acceptable or if it signifies a machine failure? They rely on statistical tracking via Levey-Jennings (L-J) Charts and Westgard Rules.
An L-J chart is a visual graph plotted daily by the analyzer’s software. The center line represents the absolute perfect target value (the mean). Above and below the center line are horizontal limits representing Standard Deviations (SD).
In clinical chemistry, a result that falls within ±2 Standard Deviations from the target is considered normal and acceptable. To interpret the scatter of dots on this chart, technicians apply the Westgard Rules—a standardized set of statistical alerts:
-
The 1-2s Rule (Warning): One single daily QC point falls just outside the ±2 SD line. This is a warning. The tech must inspect the machine, but if everything looks fine, they can usually proceed.
-
The 1-3s Rule (Rejection): One single QC point falls wildly outside the ±3 SD line. This indicates a massive, sudden failure (Random Error)—such as a massive bubble in the syringe or a power surge. The run is rejected.
-
The 2-2s Rule (Rejection): Two consecutive days in a row, the QC falls outside the same ±2 SD line. This indicates a creeping, progressive failure (Systematic Error)—such as a reagent slowly expiring or an optical lamp slowly dimming. The run is rejected, and recalibration is required.
Modern automated biochemistry analyzers have Westgard Rules programmed directly into their LIS middleware. If a rule is violated, the software automatically turns the screen red, flags the assay, and physically prevents the operator from running patient samples until the issue is fixed.

Troubleshooting False Results: Analytical vs. Pre-Analytical Errors
When Quality Control fails, or a physician questions an absurdly high patient result, the laboratory must troubleshoot. Errors generally fall into two categories: the machine/reagents (Analytical) or the blood sample itself (Pre-Analytical).
Table: Common Causes of Biochemistry Diagnostic Errors
| Error Source | Specific Issue | How it Alters the Result | Troubleshooting / Solution |
| Pre-Analytical | Hemolysis (Burst Red Blood Cells) | Falsely elevates Potassium (K+), AST, and LDH as intracellular contents leak into serum. | Reject the sample; request a fresh patient blood draw. Use larger gauge needles during phlebotomy. |
| Pre-Analytical | Lipemia (High Blood Fat) | Creates a cloudy, milky serum that blocks light, causing false high readings on optical assays. | Use high-speed ultracentrifugation to clear the lipids, or perform sample dilution before testing. |
| Pre-Analytical | Icterus (High Bilirubin) | Dark yellow/orange serum absorbs specific light wavelengths, interfering with creatinine and total protein tests. | Utilize analyzer software protocols for “sample blanking” to mathematically subtract the background color. |
| Analytical | Micro-Bubbles in Reagent | Bubbles in the cuvette scatter the photometer’s light, causing wild, unrepeatable spikes in results. | Check reagent bottles for excessive shaking; inspect the aspiration probe for air leaks. |
| Analytical | Expired Open-Vial Reagent | Enzymes degrade, leading to weak color formation and falsely low patient results. | Discard the expired bottle, load a fresh reagent lot, and perform a full assay recalibration. |
| Analytical | Cuvette Cross-Contamination | Wash station failure leaves traces of previous high-concentration reagents in the cuvette. | Run intensive alkaline/acid wash cycles; inspect the wash station’s vacuum drying nozzles. |
The Concept of “Blanking” in Biochemistry
To ensure maximum accuracy, modern analyzers rely heavily on a procedure known as “blanking.”
Because even pure distilled water and empty plastic cuvettes absorb a tiny fraction of light, the machine must establish a baseline of zero.
-
Water Blank: The machine shoots light through pure water to measure the baseline absorbance of the cuvette itself.
-
Reagent Blank: The machine measures the optical absorbance of the reagent alone (without patient serum) because many reagents have a natural yellow or pink tint.
-
Sample Blank: Used when the patient’s serum is highly icteric (yellow) or lipemic (cloudy). The machine measures the background interference of the serum itself so it can subtract that interference from the final chemical reaction reading.
By mathematically subtracting these “blanks” from the final test reading, the analyzer ensures that the reported number represents only the specific chemical reaction, completely isolating the diagnostic biomarker.
Frequently Asked Questions (FAQ)
What happens if a laboratory tests patient samples without running Quality Control?
Operating without daily QC is a severe violation of medical ethics and clinical regulations (such as CLIA or CAP standards). Without QC, the laboratory has zero proof that the analyzer is measuring accurately. It risks reporting false negatives (missing a critical disease) or false positives (leading to unnecessary, harmful treatments), creating massive legal and medical liability.
Can I use calibrators and QC from a different brand than my reagents?
Yes, this is common in “open system” laboratories. Many facilities purchase “Third-Party Controls.” In fact, using third-party, independent quality controls (rather than controls made by the exact same company that manufactured the reagent) is considered a clinical best practice, as it provides a completely unbiased, independent assessment of the reagent’s true performance.
How do I store calibrators and QC materials?
Most calibrators and controls are shipped lyophilized (freeze-dried) and must be stored in a medical freezer ($-20^\circ\text{C}$). Once reconstituted with distilled water or specific diluents, they must be kept refrigerated ($2^\circ\text{C}$ to $8^\circ\text{C}$) and are typically stable for only 5 to 7 days. Because of this short stability, laboratories prepare QC in small, daily aliquots to prevent waste.
Why does the analyzer need both Level 1 and Level 2 QC?
Clinical diagnostics must be accurate across the entire human physiological spectrum. Level 1 QC mimics a healthy patient (normal range). Level 2 QC mimics a sick patient (pathologically high or low range). An analyzer’s calibration curve might be perfectly accurate at normal levels but drift wildly at high concentrations. Running multi-level QC ensures the machine can accurately diagnose both healthy and critically ill patients.
In our next post, we will step into the future of clinical testing. We will explore how artificial intelligence, advanced micro-dosing robotics, and IoT predictive maintenance are shaping the Next-Generation Biochemistry Analyzers.